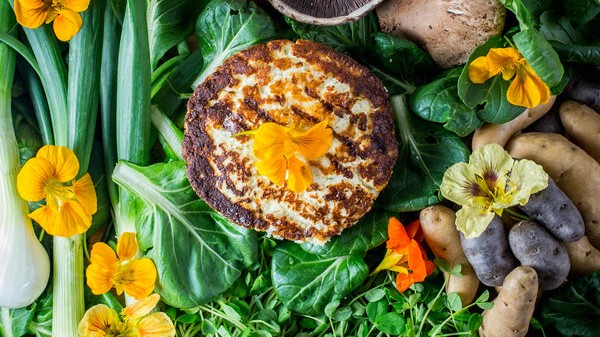
Paneer, a great cheese for sautéing and frying with spring vegetables, curries, and meats, is surprisingly simple to make at home. What's magical about this cheese is that it won't lose its springy texture - all thanks to lemon juice, salt, and some weight pressing. All you need are some basic cheesemaking tools to get started.
Homemade Paneer Recipe
Rated 5.0 stars by 1 users
Category
Cheesemaking Recipes
Servings
1 pound of cheese
Prep Time
10
Cook Time
1 minute
After you've tried this recipe, explore some of our other Cheesemaking Recipes Here! Want to learn more about cheesemaking? Check out our virtual classes.
Jessica Sennett

Ingredients
1 gallon of cow's milk (NOT ULTRA-pasteurized as this does not coagulate well)
1/2 cup lemon juice or vinegar
1/2 teaspoon salt
1 Package Cheese Cloth (ideally, fine mesh butter muslin, buy here)
Colander
large bowl
Metal Spoon (ideally stainless steel, and slotted)
Stainless Steel, Heavy-Bottomed Pot (at least 1.5 gallon capacity)
Thermometer
2 Large Plates
A 32-Ounce Can of Beans or Tomatoes (The weight for pressing the cheese!)
Equipment
Directions
Pour milk in a large, heavy-bottomed pot and heat it until it reaches 195 degrees Fahrenheit - it should be steamy and foamy but not boiling. Check with a thermometer, stirring occasionally. Once it has reached 195 degrees, remove the pot from heat. Stir in the lemon juice/vinegar, cover the pot, and let it sit for 10 minutes.
Place the colander in a large bowl in order to catch the liquid whey. Line the colander with the cheesecloth. Strain the curds with the slotted spoon, and by pouring the pot's contents carefully into the colander.
(Tip: You can make this cool, refreshing lemon whey beverage which is complete with whey protein, vitamins, and minerals. Or you can sub the whey for milk in your next baking project - it will make baked goods nice and fluffy! Or you can sub whey for veggie stock in a soup recipe. Just use the whey within 3 days, as it will start to get more acidic with time. You can also freeze it if you don't use it right away.)
Gather the cheesecloth and squeeze the curds gently to remove excess whey liquid. Careful as the curds will be hot. Open the cheesecloth and mix in the salt. Close the cheesecloth back up with the cheese inside, and wrap it up tightly like a flat, circular or rectangular package.
Place the wrapped up cheese package on a plate, then place the second plate upside down on top of the cheese package. Set the 32-ounce weight or can on top of the upside down plate. Allow the cheese to press for one hour.
The paneer is now ready to use! You can cook with it right away, searing and browning up both sides in an oil that can take high heat, like vegetable oil or ghee, you can slice it into sticks or planks or you can chop it up into smaller cubes before frying. It's great for hearty salads and, of course, Indian curries.
You can refrigerate it up to 2 days. Wrap it tightly in plastic wrap or an airtight container before refrigerating.

Leave a comment